Well what can I say. Its been over 4 years since I posted anything significant. Too little time and what time was/is available has been taken up with family and hobbies I could do with the kiddos.
But now I've been sucked back in by a new rules set called "Chain of Command". Only problem is ..... 15mm or 28mm?
Fallschirm Sturm Kompanie!

EW Fallschirmjager
Wednesday, April 1, 2015
Saturday, December 31, 2011
Updates
Hey folks,
Have been busy with life an only recently started painting Flames of War miniatures again. Here are a few of the things I've been working on.
KoningsTiger (Tiger II or King Tiger):
This is your top-of-the-line Battelfront kit. Very nice, great for customizing. Loved putting it together. Too bad they cost $22.00.


 More, yes, more Fallschirmjagers:
In my never-ending quest for THE perfect paint job on Fallschirm I continue to work until I get there. The two figure stand is for Infantry Aces. "Oberleutnant Bruno Blok" (fictitious) and his runner.

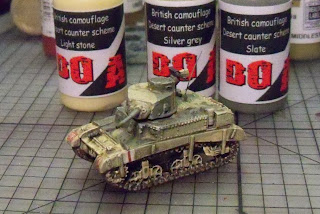
M-3 Honey Caunter Scheme:
Catch this Step-by-step at WWPD.net

Have been busy with life an only recently started painting Flames of War miniatures again. Here are a few of the things I've been working on.
KoningsTiger (Tiger II or King Tiger):
This is your top-of-the-line Battelfront kit. Very nice, great for customizing. Loved putting it together. Too bad they cost $22.00.


In my never-ending quest for THE perfect paint job on Fallschirm I continue to work until I get there. The two figure stand is for Infantry Aces. "Oberleutnant Bruno Blok" (fictitious) and his runner.

 |
| PJK 41 4.2cm taper-bore AT guns. Shame Battlefront only has them available in mid-war and not late war. |
 | |
| These are a combination of the 3.7cm and the Soviet 4.5cm guns. I took the gun shield and sanded it down to simulate the two piece shield, then cut the muzzle ring off the long barreled 4.5cm Russian AT gun. Painted them up and walah! Now just need to finish the crews up in tropicals. |
M-3 Honey Caunter Scheme:
Catch this Step-by-step at WWPD.net


Thursday, June 16, 2011
"Ada" and her two cohorts - Kit Review
I finished up the two remaining Marder IIs so "Ada" wouldn't be lonely. They look a little shinny but its the pictures. They are actually pretty matt. Also, I might be adding foaliage to these three.


KIT REVIEW
Last week when I finished the "Cassino" Objective I felt it needed some small details. I went online and looked for "HO" scale weapons and came up with these two kits from "PREISER". They are listed as "HO" Scale WWII gear (I got them from Hobbylink.com). One kit comes with mostly infantry gear and some weapons while the other is strickly weapons. The scale is a bit off for Flammes of War. THEY ARE SMALLER! Yup they are a bit smaller than FOW weapons but one can barely tell. You could not use the weapons as replacements but they are fine for detailing vehicles of objectives.


Wednesday, June 1, 2011
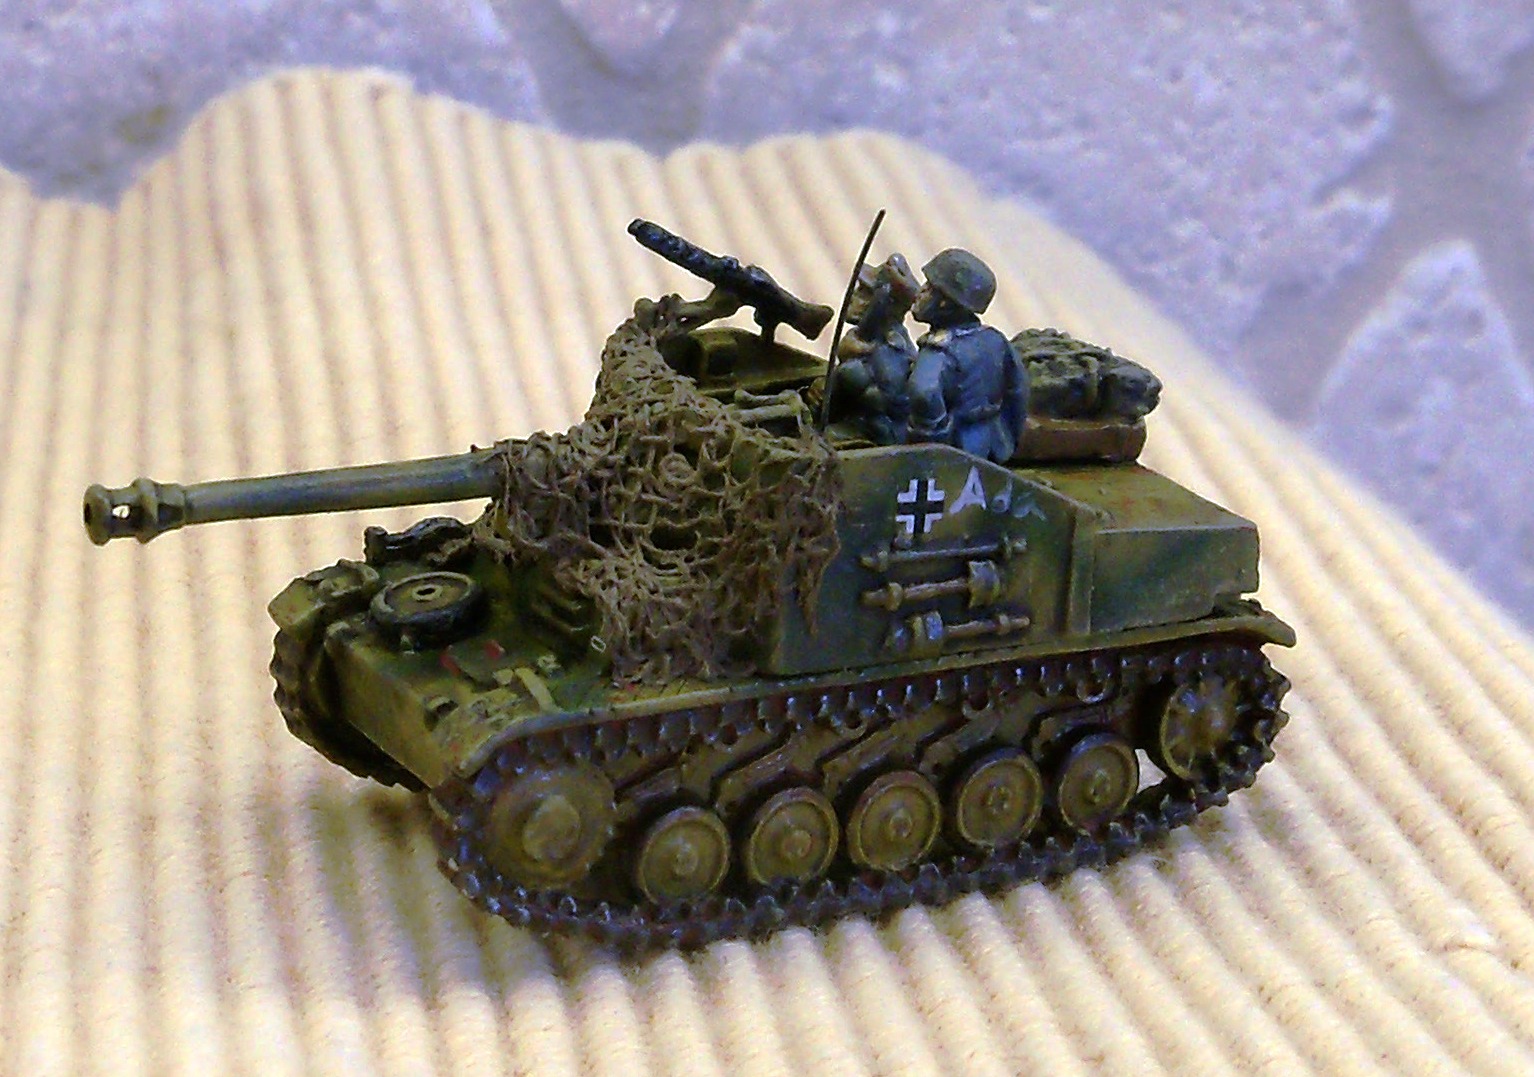
"Ada" and New Objective
I worked on these for the last two days. Needless to say I work slow.
 First off is "Ada". Platoon commander for a 3 or 4 tank Marder II Fallschirmjager PanzerJager Abteilung I circa 1944.
 Another picture of "Ada". All that is needed is some slight pigment weathering and a final coat of Matt sealer. The pictures don't do the miniature justice.
 And finally a new objective.


Wednesday, April 20, 2011
Update
Need to make some terrain for Kublacon in May and started cranking out some bocage and such.
This is two 10-12" pieces of modular bocage. They are not completed need a few touch ups here and there. Sorry for the last few pics they were taken with my iPhone.


This is two 10-12" pieces of modular bocage. They are not completed need a few touch ups here and there. Sorry for the last few pics they were taken with my iPhone.


Tuesday, April 12, 2011
PAINTING GUIDE
Max's Guide to Painting WWII Fallschirmjagers
(PART 1)
If you are like me and have a huge affinity for the history and equipment used by the German Fallschirmjagers during WWII and you play miniature wargames, I'm sure you've assembled somekind of Fallschirm unit.
This is but one of many guides out here in the web designed to teach you how to paint your miniatures. This is not THE only way to paint FJ figures but one of MANY ways. I've been comlpimented by many blog visitors and fellow wargammers on how I've painted my Fallschirm. I've been asked by a few to share my colors and techniques so I decided to take a break from my Aufklarungs company and paint a few Fallschirm minis!
COLORS:
The basic guide in Battlefront's “Hell's Highway” is what I tend to follow. It is very informative. Just beware the book states to use a brown color for the boots which, although not incorrect, brown boots where rare during wartime.
There are three different smocks that were used during the war. The Type II, which was a step in style, was worn during 1939-40 exclusively. These were seen worn throughtout the war but were not as common after 1944. You would not see a squad of fallschirm wearing all Type II smocks during or after Normandy.
 |
| Type II Smock aka "Step-In". Most came in Grey Green but some were made in Splinter "B" |
The Type III smock was introduced right before Crete in 1941 and saw service during the operation though most Fallschirm still wore Type II “Green Grey” smocks. The Type III was designed so the legs could be unbuttoned for easier removal. This made it easier to put on and take off. For the purposes of modelling at the 15mm scale one would not know the difference unless the smock was unbuttoned at the legs which would make the miniature look like a overcoat.
 |
| Type III Smock in Splinter "B" |
The Type III smocks came in two colors (some say they were also made in Waffen -SS “Pea Dot”); Luftwaffe Splinter “B” and Water-Tan. Splinter “B” differed from the Heer's Splinter “A” slightly. The patten was similar but the green “rain drops” in the pattern went vertical instead of horizontal in the Luftwaffe “B” pattern.
 |
| Type III Water-Tan (aka Marsh) |

The Water-Tan (or Marsh) pattern came out in 1943 (some say 1942). It is similar to the Splinter “B” in pattern but with different colors. At 15mm scale the pattern would almost be identical.

 |
| Splinter "B" Helmet Cover |
STEP 1: Clean and Primer
First step I take is clean the flash as best as possible from the figure, wash in warm soapy water, and let dry. Once dry, I give the figure a wash in rubbing alcohol, let it sit for about 10 minutes and then use my airbrush to primer the miniature with flat black paint (usually Vallejo Flat Black). Any flat black color will do. After this coat has dried for a few minutes I do a light overspray of a light gray primer. Again, any primer will do.

STEP 2: Base Colors
The miniature in this guide is being painted in the tropical scheme. The uniform worn in the mediterranian was usually the tropical pants although "continental" wool jump pants were not uncommon. I elected to paint this miniature without a helmet cover and painted his helmet in a "turtle" shell camo varient that was seen in Italy.
Second step is to lay down you base colors:
Part Vallejo Color
Face and hands “Beige Brown” 875
Helmet (non-helmet cover) “Green Ochre” 914
Helmet Chin Strap, Breadbag “Field Blue” 964
Type II Splinter “B” Smock (Base) ”German Beige” 821
Belt, Pistol Holster, Tornister Straps “Flat Black”
Y-Straps (Cavalry/Light Weight) “Calvary Brown” 982
Tropical Pants “Middletone”
Continental (Jump) Pants “German Grey” 830
MP-40 Magazine Pouch* “US Dark Green” 893
Canteen “German Camo Brown” 825
Canteen Cup* “Middletone”
Note I did NOT paint the green and brown camo on the smock. This is done after step 4.
*- German pouches were originally made of leather but even early on in the was they began being manufactured in cloth. They were made in green, tan, and field blue. Same thing with the breadbags. The canteen cups, as well as mess tins, were often repainted in the field. Originally these came in black or field grey btu troops often repainted them.


STEP 3: Gloss Varnish and Wash
Third step is to let the miniature dry well for several hours. Once dry, seal the miniature with several light coats of gloss varnish. Once this is dry (I let mine dry for about 2-3 hours), I give the model a good wash of Vallejo Black and Sepia washes miked with water (3 parts water, 2 parts black and 1 part Sepia). Let this dry for atleast 4-5 hours.
STEP 4: Dry brush/highlights
Fourth step is to highlight the base colors. The emphasis here is on the garments, helmet and skin. I use a combination of drybrushing and highlighting using lighter shades of the base colors. I lighten the base color using Vallejo “Sunny Skintone” or any other flesh color. It works for me as it “seems” to have a more subtle transition than white.


STEP 5: Camo
Step four is when I lay down my brown and green camo. Using a 5/0 brush, I thin the respective color with water or yoru favorite thinnerso it flows really well. Study the camo pattern and note how, for example Splinter “B”, you can note its almost a “Y” or even “L” type shape. Take your time and generate the “Y”s and “L”s. A trick that I found is to section the smock off. Arms, back, chest, and skirt. Remember that when the garmet is made the pattern will not continue in these ares as the cloth is cut cutting the pattern off.


I start off with the brown.


More to come.......
Wednesday, April 6, 2011
Steveogradskie Vodka Factory
I painted up one of JR Miniatures buildings to donate to Steve's (What would Patton Do) Stevograd city.
Its pretty much dont just going to hit it with some pigments, seal it and ship it off.


Its pretty much dont just going to hit it with some pigments, seal it and ship it off.


Subscribe to:
Posts (Atom)